Showing posts with label recipes. Show all posts

Tuesday, February 22, 2011

Cooking: The New RDA Guidelines and You

Photo: Stoxk Xchng


The RDA has recently come out and said that we should be eating 2 1/2 cups of veggies and 2 cups of fruit every day! There was a big discussion of the implications of this recommendation over at Serious Eats that I had a good time participating in. 

The scary thing is that, as a friend of mine responded, "I'm not sure if I eat that in an entire month." And the sad thing is that the produce section of the grocery store can be the most expensive! The RDA apparently did some research before putting the recommendation out there, and calculated that this would cost $2.50 per day. While at first this sounds reasonable, that is per person. So for my family of four, the recommendation of produce alone would cost $300 a month! Yikes!

Right there is a great reason to join me in growing veggies in the backyard this year! Other than that, I can't help you with the financial aspect, but there are couponing sites and such out there that may be of help. I can say that if you shop for produce that is in season and local, such as at farmers markets, then that will be much more economical. Oh, and there are lots of ways to reduce produce waste - that will save a lot right there! For example, buy a bunch of onions and green peppers and when you get home, wash & chop them, then freeze portions in ziplock baggies. They can then be used any time to add in to omelets, hash browns, soups, meatloaf, and lots more recipes, and they won't get rotten sitting in your fridge!

Anyhoo, what I can help with is how in the world to eat lots of fruits & veggies every day! The new recommendation shook me out of complacency and made me realize that we can do much, much better. One idea that I am implementing right away, because it is a cinch, is:

Lunch every day is salad as a base. Don't cringe! There is so much you can do with a salad to make it yummy! I plan to make a different salad each weekday so that it doesn't get boring and gross. Here are three ideas that we do already:


Yikes - this was a day we didn't have many veggies in the fridge!


Salad bar - This actually doesn't take long, and the kids are more likely to eat a salad when they get to pick & choose and put it together themselves! The only thing is that if you let them pick ingredients themselves, you may have to require a certain number of veggies or colors be added or else they will just make a bowl of lettuce, cheese, and ranch! =)


This is BBQ fake-chicken instead of pulled pork, cuz Jill was feeling vegetarian.


Texas Salad - Okay, I totally made up that name. But I think it fits. This one is nice and filling because of the added proteins. You take a bed of lettuce and whatever veggies you want. Add a spoonful of BBQ pulled pork to the top, a sprinkle of cheese, and some ranch dressing. Hard-boil some eggs and add them on the side. You could even add some crumbled bacon, but now we're getting really fatty (And tasty! Tee hee).


Photo: Stock Xchng


Popcorn Shrimp Salad - Simply add some pre-made or homemade popcorn shrimp for filling protein and tasty taste!


By the way, to lettuce you can add: carrots, celery, mushrooms, bell peppers, broccoli, cauliflower, apples, red onion, cheese, croutons or chinese noodles, eggs, meats, tuna salad, salmon salad, seafoods, fake crab meat, sprouts, water chestnuts, those little baby corns, olives, artichoke hearts, asparagus.

An added benefit? If you're eating a salad every day, those veggies won't get spoiled sitting in your fridge!

One note about kids and veggies: if your child still refuses to eat the salad, I err on the side of coercion. I believe that as parents we are responsible for protecting our kids and for keeping them healthy. We sometimes must enforce decisions for them because they simply don't know better. It doesn't have to be a battle though! 

With my now 6-year-old, I matter-of-factly served salad with dinner every day and said simply that he must eat it before he leaves the table. He whined for a couple of days but very quickly realized that I was serious and then just starting eating salad every day like its any other food! I know some people may balk at me for this, but there is a difference between battling over food and simply making a loving requirement. I told him his body needs green veggies to grow big and strong and that I love him and want him to be healthy, so he has to eat his salad. End of story. 

We did the same thing when we started putting broccoli on pizzas. Now all three kids prefer pizza loaded with veggies. Okay, they would totally choose meat-lovers if given the option, but they truly say that our homemade veggie pizzas are better than commercial cheese or pepperoni pizza! =)

More to come on this topic!

Thursday, February 10, 2011

Super Easy and Delicious Homemade Chicken Noodle Soup


I came across this recipe for Soba Noodle Bowl. I didn't have soba noodles and couldn't find them at the grocery store, so I used whole grain spaghetti noodles that I had on hand. The recipe called for sugar snap peas, which I did buy, but they go in at the end since they cook so fast and I totally forgot them! It also called for parsley and red pepper flakes for garnish when serving but I didn't do garnish.

So what I ended up with looked like a homemade chicken noodle soup but because of the extra flavoring from using a recipe that was not for chicken noodle soup, it turned out absolutely delicious! It was super easy to make and since the chicken cooks in the broth, the chicken turned out super moist and tender - sooo good!

Here's how you make Soba Noodle Bowl Turned Homemade Chicken Noodle Soup:
(This makes a nice big batch. If you make it for lunch and don't want leftovers, you can halve the recipe.)

  1. In a large pot, heat up 28 oz. of chicken broth along with 2 cups of water to boiling.
  2. Meanwhile, slice four chicken breasts into bite-sized pieces. Also slice four large carrots and a jalapeno pepper. (Don't worry - it won't be spicy, just flavorful!)
  3. When the broth is boiling, add the chicken and veggies to the broth. Also add four tablespoons of soy sauce and 6 to 12 oz. of spaghetti noodles (however you like your soup - lots of noodles or less noodles).
  4. Cover and cook for about seven minutes, until the chicken is cooked through and the spaghetti noodles are cooked.

If you have kids old enough to chop veggies, this is a great dish to make with the kids. Enjoy!


Tuesday, February 8, 2011

Easy Valentine's Cookie Fun and Another Valentine Idea for Boys

Okay if you don't feel like messing up your kitchen and/or making Valentine's goodies from scratch, here is a good way to let the kids have fun anyway. I bought some chocolate chip cookie dough, ready to bake:


We took each one and flattened it a bit (just with the palms of our hands) and cut them out with heart cookie cutters:


After we baked them, I melted some white baking chocolate (in a bowl in the microwave), stirred in a few drops of red into one batch to make pink, a lot of red into another batch to make red, and none into one batch to leave it white. Then we poured the chocolate into decorating bottles (You can find these in the baking section of any craft store; I bought mine at Wal-mart for $1 each!) and the kids used them to decorate the cooled cookies! No mess, easy peasy, and fun for the kideos!


ANOTHER VALENTINE IDEA FOR BOYS!

I previously found the cutest idea for making Valentine cookies with boys: use heart-shaped cookies to make Spiderman cookies. Well I just found another idea from Sugar Swings: chocolate lego men! You can buy lego-men ice or candy molds and use candy melts to make Valentine-colored lego guys, then use them to make cards for your boys to give out!


Monday, February 7, 2011

Healthy and Fun Snack


This snack is easy and makes eating healthy fun for the kids. Get the kids in on making these!


Chop up seasonal fruit into little pieces. Fill ice cream cones with yogurt and chopped fruit. That's it!


Thursday, January 27, 2011

Quick and Easy Lunches for Homeschoolers


As homeschoolers, we have a unique predicament when it comes to food: we have to feed our families three times a day, every day. Lest we spend all of our money and time on food, we need some good options! Here are a few of our lunch regulars, which are both easy and economical:

Thursday, January 20, 2011

Simple and Healthy Snacks for Homeschool Kids

Photo from Kara's Party Ideas, a fabulous site for birthday party planning!
This is actually part of a green, orange, & blue 1st bday party.

The past year has been an interesting one for us in regards to snacking. Little Bill went through a "goldfish" stage (you know, those cheese crackers shaped like fish). It's all the kid wanted to eat every single time he was hungry. At the same time, Jack started growing like, well, a teenage boy. So he is wanting food at every turn. Finally at my wit's end at trying to keep these boys fed and healthily at that, I created a snack system.

I went out and bought a pack of little storage containers for Little Bill. I start off my week, or every few days, by filling these with apple sauce, yogurt, veggie sticks & dip, garbanzo beans, nuts & seeds, cheese cubes, fruit pieces, graham crackers & peanut butter, and the occasional treat of something like jello squares. I fill them all up, pop them in the fridge, and when he says he is hungry during the day, I tell him (with confidence that he is eating healthily) that he can choose any snack container in the fridge to munch on.

I did the same thing, with bigger storage containers, for Jack. His appetite is much bigger; he needs things that are healthy but that are more filling, so for him I pack: potatoes in some form, ramen noodles (the healthy kind, not the 17-cent Walmart kind), peanut butter bagels, hard-boiled eggs, cheese & crackers, nuts & seeds, granola to add milk to, flavored brown rice or whole grain cous cous, etc. Last year I made them for him and popped them into the fridge for when he would tell me he's hungry. What was I thinking? The kid is 15! My love of mommy-ing sometimes clouds my judgement of what the kids should be doing for themselves. This year he prepares the food and fills the containers himself! But this way, he always has healthy, filling snacks when a craving hits.

What do you do for snacks for your hungry homeschoolers?

{This is an article moved from the old typepad site.}


Thursday, January 13, 2011

5 Food Websites That Will Have You and Your Kids Running to the Kitchen

{I am moving over some posts from the old site, and this is one of them!}


I love food and I love kids. Put the two together, and I love to find ways to make food really fun for my three kideos. I often run across cute ideas while surfing around the web. I clip the ideas and save them in Evernote. But I also have a few fun food websites that I regularly visit. I certainly don't make sandwiches into little Asian girls and pancakes into flowers every day. But when I feel like perking up the kids, surprising them, or doing something fun in the kitchen with my creative daughter, these sites never fail to give me plenty of ideas.

Tuesday, January 4, 2011

Random Thoughts and a King Cake Recipe

King Cake

On Winter . . .

January gives me such trouble. I spent 28 years of my life in the same place, a place where there isn't a real winter. In January the sun still shone brightly more often than not, there were even still days sprinkled in on which one could wear short sleeves, the birds didn't leave for winter, there was evergreen everywhere so grass was dead but green was around, life was around. Now I live in a place with definite winters. And I enjoy having four real seasons, and the snow is absolutely mesmerizing and gorgeous. And fun to play in. But the world around me is dead. There is no green; trees are all bare. The sun has gone. Sure, it makes an appearance but its rare. There is no warmth. There is no life - the birds have flown away for the winter, there are no sounds of frogs or bugs or any nature at all. Its so dark that I open my blinds in the mornings and it doesn't even make much of a difference. 

I don't notice it so much in December due to the anticipation and excitement of Christmas. But as the Christmas season comes to a close in January, it all sinks in. And I have to catch my breath and remember that life goes on, even in the darkness. I remind myself that Jesus is here, the light of the world, and though I can't see it around me, I must close my eyes and feel His light and warmth in my heart. 

At midnight mass on Christmas, our priest turned off the lights in the church (after lighting the candle) and reminded us that though our world is dark with sin and pain, we wouldn't notice the Light at all if it weren't. When the church lights were on, the candlelight just blended in, no one gave it much attention at all. But in the darkness, it becomes the focal point and shines so brightly. It becomes light and hope to us all. 

He also tied it in to the Easter vigil, where the church is completely dark and each attendee is given a small candle to hold. The priest lights one with the Easter candle and the light gets passed on, one person to another, and the church gets brighter and brighter as we share His light with each other. It starts with Him, and before long the darkness is gone and the room is bright with the light of Christ. 


On Seafood . . . 


My parents are taking a trip to Louisiana this weekend. After reading conflicting reports about the current safety of the seafood, I asked my dad what he thought about it and whether he was going to eat seafood while they were down there. His response?

"Heck yeah, I'm going to eat the seafood. As much as I can possible fit in my face."

There ya have it folks, a true New Orleanian.


On Epiphany . . .


Photo: Stock Xchng/ Zacchaeus

Two more days until epiphany. I have one previous post about it here. A common tradition is the blessing of the home and I found a beautiful one that I really like at Perpetual Priest.

We always have a king cake on epiphany (click here if you don't know what that is!). So today I will try yet another recipe. There are a million king cake recipes out there, and they all produce very different results. Those who are regulars with regards to king cakes usually have a specific way they like it. See, some are moist and some are very dry. Some have frosting and some just have sugar sprinkles. Some have filling and some are just very cinnamony. I am going for a specific kind that I have always had and that I like best. So it is difficult to come upon. The past few years I have had okay results with homemade king cake, but I'm definitely not satisfied. 

My mother just gave me one of her recipes, so I shall try it today and let you know how it turns out. Here is the recipe:

TRADITIONAL KING CAKE

Makes 2 cakes (about 18 servings each [don't believe it!])
PREP:  30 Min; COOK, 10 min; STAND, 5 min; RISE, 1 hr., 30 min.; BAKE: 16 minutes.

This recipe uses bread flour, which makes for a light, airy cake.  You still get tasty results with all-purpose flour - the cake will just be more dense.

1 (16-ounce) container sour cream
1/3 cup sugar
1/4 cup butter
1 teaspoon salt
2 (1/4-ounce) envelopes active dry yeast
1/2 cup warm water (100 to 110 degrees)
1 tablespoon sugar
2 large eggs, lightly beaten
6 to 6 1/2 cups bread flour (or all-purpose)
1/3 cup butter, softened
1/2 cup sugar
1 1/2 teaspoons ground cinnamon
Creamy Glaze
Purple-, green- and gold-tinted sparkling sugar sprinkles

COOK first 4 ingredients in a medium saucepan over low heat, stirring often, until butter melts.  Set aside, and cool mixture to 100 to 110 degrees.
STIR together yeast, 1/2 cup warm water, and 1 tablespoon sugar in a 1-cup glass measuring cup; let stand 5 minutes.
BEAT sour cream mixture, yeast mixture, eggs and 2 cups flour at medium speed with a heavy-duty electric stand mixer until smooth.  Reduce speed to low, and gradually add enough remaining flour (4 to 4 1/2 cups) until a soft dough forms.
TURN dough out onto a lightly floured surface; knead until smooth and elastic (about 10 minutes).  Place in a well-greased bowl, turning to grease top.
COVER and let rise in a warm place (85 degrees), free from drafts, 1 hour or until dough is doubled in bulk.
PUNCH down dough, and divide in half.  Roll each portion into a 22 x 12" rectangle.  Spread 1/3 cup softened butter evenly on each rectangle, leaving a 1-inch border.  Stir together 1/2 cup sugar and cinnamon, and sprinkle evenly over butter on each rectangle.
ROLL up each dough rectangle, jelly-roll fashion, starting at 1 long side.  Place one dough roll, seam side down, on a lightly greased baking sheet.  Bring ends of roll together to form an oval ring, moistening and pinching edges together to seal.  Repeat with second dough roll.
COVER and let rise in a warm place (85), free from drafts, 20 to 30 minutes or until doubled in bulk.
BAKE at 375 for 14 to 16 minutes or until golden.  Slightly cool cakes on pans on wire racks (about 10 minutes).  Drizzle Cream Glaze evenly over warm cakes; sprinkle with colored sugars, alternating colors and forming bands.  Let cool completely.

CREAMY GLAZE
Makes 1 1/2 ups
Prep:  5 min.

3 cups powdered sugar
3 tablespoon butter, melted
2 tablespoons fresh lemon juice
1/4 teaspoon vanilla extract
2 to 4 tablespoons milk

STIR together first 4 ingredients.  Stir in 2 tablespoons milk, adding additional milk, 1 teaspoon at a time, until spreading consistency.

CREAM CHEESE-FILLED KING CAKE
Prepare each 22 x 12 " dough rectangle as directed.  Omit 1/3 cup softened butter and 1 1/2 teaspoons ground cinnamon.  Increase 1/2 cup sugar to 3/4 cup sugar.  Beat 3/4 cup sugar; 2 (8-ounce) packages cream cheese, softened; 1 large egg; and 2 teaspoons vanilla extract at medium speed with an electric mixer until smooth.  Spread cream cheese mixture evenly on each dough rectangle, leaving 1-inch borders.  Proceed with recipe as directed.

In Closing . . .

Thanks for reading this blog. It has been fun to create, and I am looking forward to all kinds of interesting posts this month now that it is a new year. This is my 99th post! Wow! Quite the exciting feat for me because I am such a scattered person. I have to think of a way to celebrate the 100th post. Any suggestions?

God Bless you all, my dear readers,


Monday, January 3, 2011

How to Make Homemade Beignets


Do you know what beignets are? They are French donuts - square, crispy on the outside, light and fluffy on the inside, delicious! Being from New Orleans, we have eaten quite a few beignets over the years! The most famous place to get them, of course, is Cafe du Monde in the French Quarter. Now that we live away, I like to make them at home for special occasions, like birthdays, New Year's, and Mardi Gras. 

I hate to admit it, but when we visit New Orleans, I usually get a couple of boxes of the beignet mix from Cafe du Monde to make them with. But when I run out and want to make some, I am left with either finding a good recipe or going without. The thing is that there are about as many different beignet recipes out there as there are people who post them! But I finally took the plunge and started testing a few out - adding this here, taking out that there, and just tweaking until I was left with an authentic recipe that I thought was great.

Some recipes call for yeast and lots of time and effort. What? Totally unnecessary! Beignets are actually easy to make. Mix dry ingredients, mix wet ingredients, put them together, flatten the dough & cut into squares, fry & eat!

Beignets are typically served with powdered sugar on top and strong coffee or cafe au lait (half coffee, half milk). Know what would be fun? Make these with the kids - they are perfect for that - and then watch The Princess & the Frog or Labou!

Visit my Examiner page for the recipe. Enjoy!  

Wednesday, December 29, 2010

Quick and Easy Chili Casserole

This is a super-easy recipe for chili casserole. I love casseroles this time of year because they are warm and hearty, the oven heats the kitchen in this cold winter, and there's little time and cleaning investment.


This casserole pretty much simply involves lining a baking pan with refrigerator biscuits.


Then pouring barbecue chili on top. I made mine, full of veggies, but you can make it any way, or even use canned!


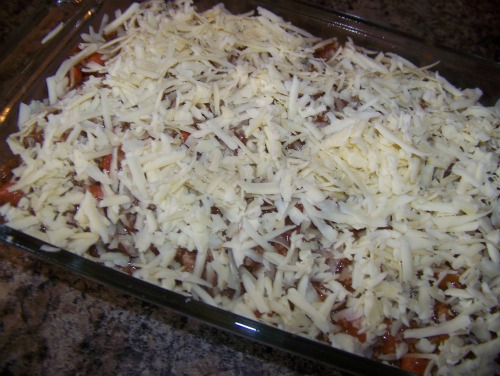
Sprinkle the top with cheese and cook. So yummy! Serve with corn or green beans and a nice salad. 

Head over to my Examiner page for the full recipe/ instructions.

Enjoy!


Monday, December 20, 2010

5 Ideas for Christmas Food Fun

In case you missed me saying it before, I love Evernote! You know how you cut out recipes and ideas from magazines and file them away in file folders or sections of a binder? Well I do. So this is basically doing that but online! As your browse around the web, you can highlight something you like - text, photo, even audio or video -  and "clip" it. It automatically goes to your Evernote account and you can file it under any tag you like. It is fab-u-lous!

Anyway, I thought I'd share with you what's in my fun Christmas food folder:


1. Snowman powdered donuts from Creative Gift & Party Ideas.


2. This idea from Better Homes & Gardens is for a large glass bowl to use as a punch bowl. But I say go buy several small glass fishbowls from the dollar store, wash them, then paint the face on the inside of them with melted chocolates, fill with eggnog, and give one to each kid as a drinking glass!


3. I love finding real food made into fun holiday-themed items, because as cute as you can make things out of goodies, its too much junk! This came from The Party Blueprints Blog. These ladies are fabulous and the blog is a must-see. They have been on television and have their own book out. Click for the recipes/instructions for these appetizers.


4. Another non-dessert holiday-themed food! Christmas pizza! Check out Delia Creates for the recipe/how-to. She uses white sauce, made with roux, whipping cream, and garlic. There you have it folks; the woman has stolen my heart right there. Delia has great recipes & ideas, mesmerizing photographs, and free printables to go with her ideas! Check her out when you get a chance.


5. I filed away these gorgeous poinsettia cookies from Skip to My Lou because they are so beautiful. But I never went back to them. Well while I was out Christmas shopping, I stopped in at our local chef store and they had a whole wall of individual cookie cutters. Lo and behold, at the very top were several types of poinsettia cookie cutters! I instantly remembered these cookies I had put into Evernote! Click for the recipe and step-by-step how-to.

Happy Cooking!


Thursday, December 16, 2010

Snowman Truffles


These snowman truffles were really fun to make with the kids. They are extremely rich, so serve just one and include a big glass of milk to wash it down! The hats didn't turn out great for me; I think I didn't thin the chocolate enough. But we had a blast and I think they are so cute.

First I made cookie dough truffles because they are super easy and delicious. Simply blend together 1/2 cup softened butter and 3/4 cup brown sugar in a medium mixing bowl, using an electric mixer. Beat until blended & smooth. Then add 2 cups of flour and 1 can of condensed milk. Beat again until blended & smooth. Form into balls and put into the fridge to firm up. I used a scooper so they would all be about the same size. 


While the dough is in the fridge, melt a bag of chocolate chips with a spoonful of shortening. Coat large marshmallows and put on a Silpat mat or waxed paper to harden. Dip thin wafer cookies and put them to harden as well. I think I needed to make the chocolate thinner with more shortening so it would drip off, leaving a thin, smooth layer. Instead my chocolate was apparently too thick because it ended up splotchy. If you don't have thin wafer cookies you could also simply use a spoon and pour circles of the melted chocolate onto the waxed paper and let them harden. Oh, those weird extra shapes in the photo? I had too much chocolate so I made chocolate-covered cherry clusters with the rest!


While the chocolate hat pieces hardened I dipped the cookie dough balls in melted white chocolate with shortening in it. This came out a lot smoother. Hey, you could use donut holes if you don't want to make the balls!

"Paste" the hat tops & bottoms together to make snowman hats with some melted chocolate. While that hardens, make faces on the snowman balls with black gel icing. I had some Halloween sprinkles and picked out the orange ones and used the black gel to "glue" the noses on.

"Paste" the hats onto the snowman balls with melted chocolate. This worked for most of my snowmen, but on a few I had to take a sharp knife and kind of shave off the top of the snowman head to make it flatter so the hat would stay on.


Tater Tot Casserole


Doesn't "tater tot casserole" sound like something the kids would come running into the kitchen for? Indeed, my kids gobbled this stuff up and asked for seconds! It's very easy & fairly quick to make and though we made lots, we didn't need storage room because there were no leftovers!


In a large pot, heat up 2 cans of cream of chicken soup and two cans of cheddar cheese soup. Add in 1 1/2 cups of water or milk. I used water to make it a bit less rich.


Chop some broccoli and throw it into the pot. Turn up the heat until its simmering and the broccoli will cook a little bit.


Toss in two cooked and chopped chicken breasts, and stir it all together.


Pour the mixture into a 9x13 baking pan.


Pour a bag of tater tots on top and spread all around to cover the whole top. I found these tater tot "crowns" which I used because they are flatter and so make for an easier topping.


Sprinkle the top with about 1/2 cup grated cheddar cheese. Pop into a 375-degree oven and cook for 15 minutes. Then cover the top with foil and cook for another 20 minutes.


So delicious! By the way, don't salt this! The soup already makes it plenty salty!


I found this idea at Meet the Dubiens, where you can find lots of great family recipes and crafts! Right now Jill has instructions to make kids' art coasters (another great grandparent gift!) and lots of crafts involving kids' fingerprints. I have lots of to-do's with Little Bill after perusing the site!

Wednesday, November 17, 2010

Chewy Chocolate Chip Gingerbread Cookies


I found these cookies a couple of years ago in a Martha Stewart magazine, and made them for Christmas presents for family members that year. Of course, I ate many as I was creating the gifts, and the are absolutely delicious! These are my favorite cookies ever now, and they are fairly easy to make as well. 

Recipe for Chewy Chocolate Chip Gingerbread Cookies

  • 1 1/2 C flour
  • 1 Tbsp cocoa powder
  • 1 1/4 tsp ginger
  • 1 tsp cinnamon
  • 1/4 tsp nutmeg
  • 1/4 tsp cloves
  • 1/2 tsp ginger


  • 1 stick unsalted butter, softened
  • 1/2 C dark brown sugar
  • 1/4 C molasses


  • 1 tsp baking soda dissolved in 1 1/2 tsp hot water


  • 1/2 C chocolate chips


  • 1/4 C granulated sugar


How to Make Chewy Chocolate Chip Gingerbread Cookies

  1. In a medium mixing bowl, mix together the flour, cocoa powder, and all of the spices. Set aside.
  2. In a large mixing bowl, blend together the butter and brown sugar with an electric mixer until smooth and well combined. Add in the molasses and continue to mix until combined.
  3. Mix in the flour, in 2 batches, alternating with the baking soda mix. 
  4. Stir in the chocolate chips.
  5. Transfer dough to a sheet of plastic wrap, pat down to 1" thick, wrap and refrigerate for 2 hours or more.
  6. Preheat oven to 325 degrees. Line cookie sheets with parchment paper or Silpat. 
  7. Roll dough into 1 1/2" balls, and stick back in the fridge for 20 minutes.
  8. Roll the balls in the granulated sugar and bake until surfaces crack slightly, about 10-12 minutes.
  9. Once cooled, they can be stored in an airtight container. Martha says for 5 days, but I would say a full week. Believe me, they won't be around longer than that - they are so yummy!


Friday, November 12, 2010

Recipe for Easy Turkey Taco Bake

Photo: Flickr/ bcmacsac1


This dinner is very inexpensive, super easy, and delicious!

Easy Turkey Taco Bake

2 C corn chips, crushed

1 16-oz. can refried beans
2 C Monterey Jack cheese, shredded
1 C salsa

2 C ground turkey or beef, cooked with Mexican/taco seasoning

1 green onion, sliced
1 tomato, chopped

How to Make Easy Turkey Taco Bake

Preheat oven to 400 degrees. Coat a 2 1/2 quart baking dish with non-stick cooking spray. Fill the bottom of it with the crushed corn chips.
In a small saucepan, heat the refried beans until smooth and heated through (stir regularly).
Remove from heat and stir in 1 C of the Jack cheese, and all of the salsa.
Spread this mixture over the chips in the baking dish.
Sprinkle the turkey/beef over this, and cover with the other 1 C of Jack cheese.
Sprinkle the green onions on top.
Cook for 20 minutes, until cheese is melted.
Top with chopped tomato, and serve.

This recipe serves 4. I found it in Taste of Home magazine.
Serve with green beans and/or corn on the side, and a nice side salad.
If you want to double up, skip the corn chip layer and put the other layers right into your freezer container. When you serve it again, simply heat it up in the oven or microwave and serve over fresh corn chips.

Thursday, November 11, 2010

Recipe for Shrimp Creole

Photo: Flickr/ Bill Michalski

For the first of the 45 days of faith, family & fun series, the food idea for the day was to make a big batch of shrimp creole for dinner and freeze the leftovers into one or two more dinners that can be used on a couple of busy December nights. 

I filmed the making of the shrimp creole for you and when I went to download the video to my computer for editing, I found that my videocamera has no slot for a firewire! Yes, it is that old. Yikes!

So my apologies for not having the recipe up sooner. And no video. =(  I also filmed two cookie recipes, so I will have to find a way to get that footage to my computer!

In the meantime, here is the shrimp creole recipe. It takes a bit of time to chop the veggies and for the stirring. But once you've made it, you have more than one dinner to show for it! Serve over rice and with nice crusty loaf of French or Italian bread and a big salad.

Shrimp Creole Recipe

1/4 C olive oil
1/3 C flour

1 chopped onion
1 chopped bell pepper
2-3 stalks of celery, chopped
1 bunch green onions, chopped
4 cloves of garlic, chopped
1/4 C parsley, chopped

1 12-oz. can tomato paste
1 12-oz. can tomato sauce

1/2 C cooking sherry
3 Tbsp lemon juice
Tony's seasoning or hot sauce
worcestershire

shrimp
sausage

How to Make Shrimp Creole

First you make a roux. Luckily, this is a very light roux, so only takes about 15 minutes. In a large dutch oven or pot, mix together the olive oil and flour. Heat over medium-low heat, stirring constantly until you smell a nutty flavor and it starts to tan.

Next, add all of the chopped vegetables and mix. Cook for 5 minutes, stirring regularly.

Now add the tomato paste and sauce and mix. Cook for 3 minutes, stirring regularly.

Increase the heat to high, fill the tomato paste can 6 times with water and add to the pot. Add the wine and lemon juice. Now season it up with salt & pepper and hot sauce or spicy seasoning (like Tony Chachere's). Add a dash of worcestershire as well. Bring to a boil and simmer while you are cooking the rice.

While the shrimp creole and the rice is simmering, peel your shrimp and cut up your sausage. Use as much as you like. I usually use two pounds of shrimp and a package of boudin or andouille sausage. If you cannot find either of these cajun sausages, use whatever kind you like. It'll be good! 

Throw the shrimp and sausage into the mix ten minutes before you are ready to serve. Pour the shrimp creole over a bowl of rice, break a piece of crusty bread to soak up the juice with, and have a big salad to round things out.

Enjoy!

After the shrimp creole had been served and the remainder cooled,  I poured the leftovers into two freezer containers, labeled them, and put them in the freezer. Cook fresh rice when you serve it again.